Cerbos Hub’s Collaborative IDE: Craft access control policies in your browser in real-time
Setting up Cerbos Hub with your policy repository and Cerbos PDP was covered in our first article, Get started with Cerbos Hub. We followed that with Authorize on the edge with Cerbos Hub and embedded PDP bundles, focusing on using Embedded PDPs to optimize authorization at the edge. That was then followed-up with Managing access control policies and PDPs with Cerbos Hub, showcasing the orchestration powers of Cerbos Hub.
This next article introduces the in-browser IDE Playground, available to Cerbos Hub users. The playground is designed to streamline access control management, providing a central collaborative environment for developer, product, or security teams to work on authorization policies together.
Prerequisites:
- A browser of your choice
- Cerbos Hub account (create one here)
We’ll cover the following:
- How to create a new playground instance
- How to invite your team members
- How to collaborate in the IDE
- The playground IDE structure
- Editing policy repository files
- Evaluating policies
- Testing policies
- Troubleshooting
- Exporting policies
Create a new playground instance
Upon logging into Cerbos Hub, go to the Playgrounds tab of your navbar and click the Create new playground button.
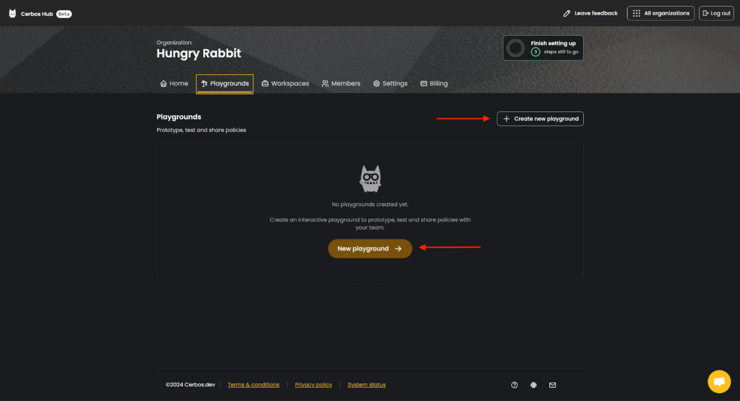
You can choose one of the following options:
- Start from scratch,
- Use a pre-built example,
- Import existing policies from your connected GitHub repository.
For this article, we’ll use the pre-built expense management example. Click the Expense management option as shown below.
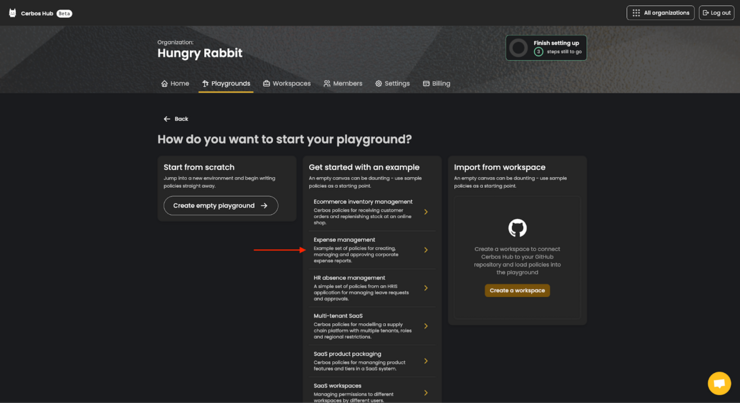
Optionally, change the title and the description of the example. We’ve changed ours to Expense management - Blog Tutorial. Then click the `Create playground` button.

After that, the playground creation is ready, and a new window opens up - the playground.
Invite your team members
To invite more people to your Cerbos Hub organization, first go to the Members tab, then click on the Invite member button.
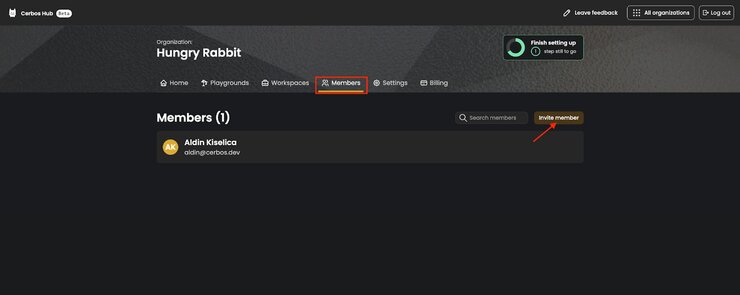
After that, insert the email address of the person you’re inviting, and click the Invite to your organization button.

Your teammate(s) will then receive an email with an invitation link.
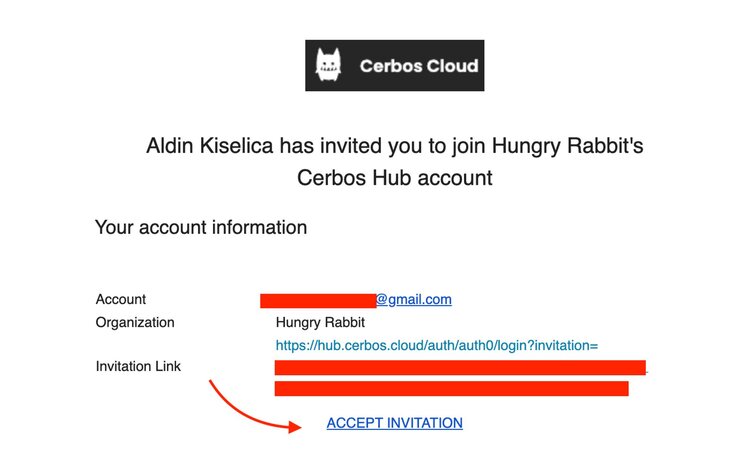
Invited users should click the ACCEPT INVITATION link, leading them to a login form. After successful login/registration, the invite request is accepted.

Upon accepting an invite, your teammate becomes an organization member; a full-fledged collaborator on all of the workspaces and playground projects in your organization.
Collaborate in the IDE
So far we showed you how to create the playground and how to invite team members to collaborate with. Let’s see what the collaboration looks like.
Each person you add to your Cerbos Hub organization will be able to access everything you do, including collaborating on crafting the playground policies. This makes communication around access control easier and more transparent, so that your team collectively can implement authorization policies with more confidence.

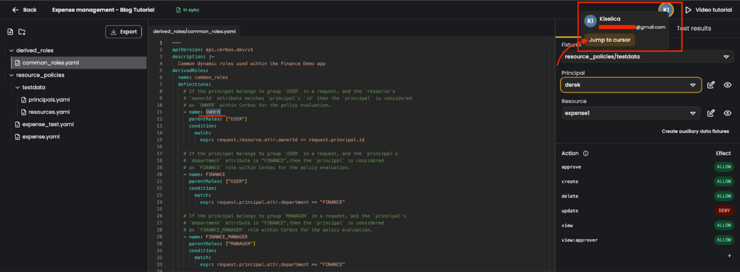
You will see who is actively working on the same playground as you are, indicated by circular icons in the top right corner of the screen.
To track their progress click on the Jump to cursor button which will lead you where your selected organization member is working. Their circular icon will show up next to their cursor to make it easier to follow them.
💡Caution
At the moment, all collaborators have the same editing rights. So make sure to use discretion when choosing who to invite. Making a change anywhere in the playground triggers an automated sync, affecting all the collaborators simultaneously.
Get acquainted with the playground IDE structure
Cerbos Hub Playground is an in-browser IDE where you can store and organize policy files, create new ones, and edit their content.
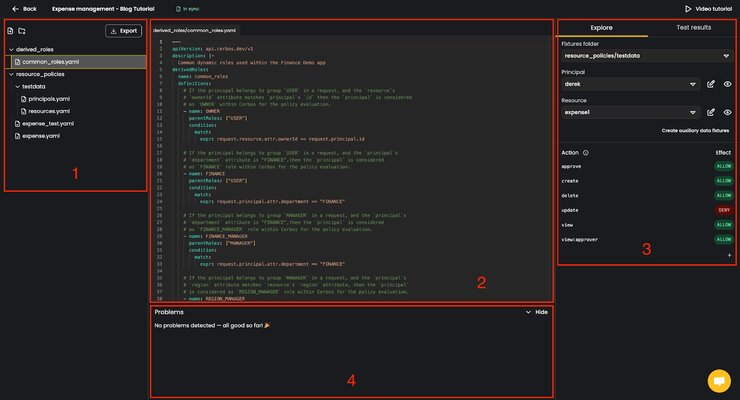
On the left hand side of your playground (1, in the image above) is the file browser for your policy repository. There, you can create new files and directories, select and edit the existing ones, and export the policy repository to your local machine.
The central part of the screen (2) is reserved for file editing, that’s where the magic happens. As you edit a file, the Explore and Test Results tabs on the right-hand side (3) will respond in real-time, helping you detect how the changes affect the test data and fine-tune your logic accordingly.
On the bottom of the screen is the Problems section, (4) helping you address any issues that might occur during you and your collaborators editing the policy repository files.
Editing policy repository files
Your playground policy repository files are where you will define and configure derived roles, schemas, tests and test data.
Cerbos expects the policy repository to have a particular directory layout.
- The directory must only contain Cerbos policy files, policy test files and schemas. Any other YAML or JSON files will cause Cerbos to consider the policy repository as invalid.
- If you use schemas, the
_schemasdirectory must be a top-level directory at the root of the policy repo. - All policy tests must have a file name ending in
_testand a.yaml, .ymlor.jsonextension. - Directories named
testdatacan be used to store test data for policy tests. Cerbos will not attempt to locate any policy files inside those directories. - Hidden files and directories (names starting with
.) are ignored.
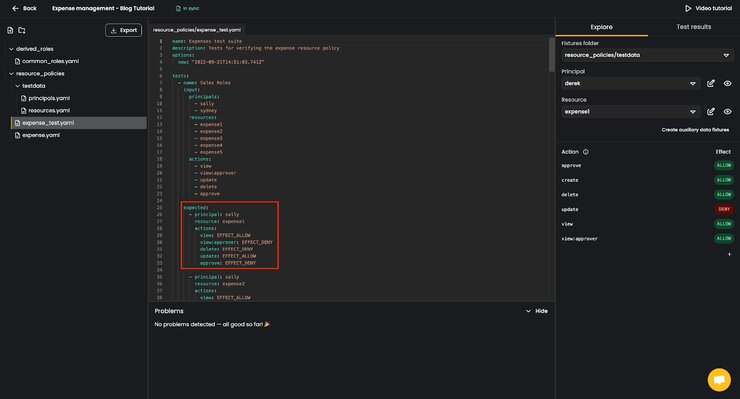
Here’s an example of how it looks within the Hub playground environment:
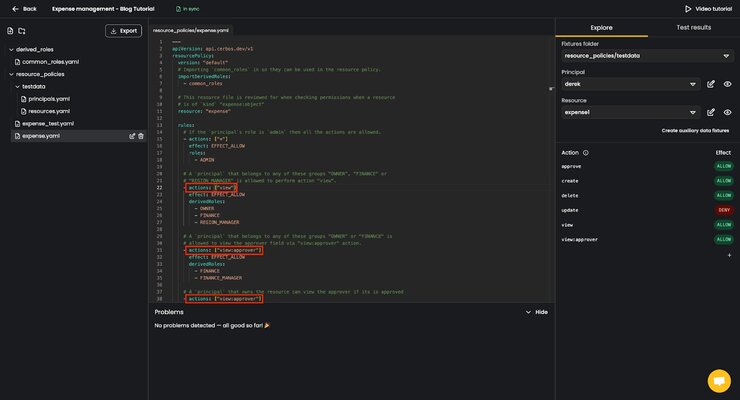
- In the loaded example we’ve opened the
expense.yamlfile, located in theresource_policiesfolder. In that file we defined a set of policies for each action, defining who is able to do what within the given expense management system.
- Moving to the
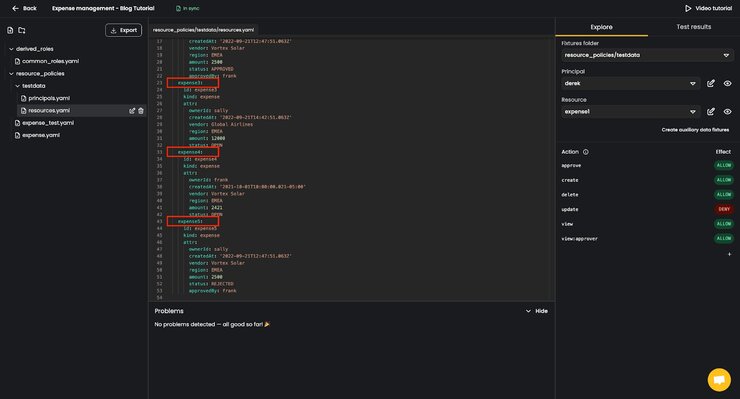
resource_policies/testdatafolder of the policy repository, we created theprincipals.yamland theresources.yamlfiles, each containing a set of dummy users and resources which we’ll use to test if our policies are working the way we want them to.
- And, in the
expense_test.yamlfile we loaded the above defined test data to write the expected outcomes for each of the relevant user, resource, action combinations.
Make sure to read our documentation on the best practices and recipes to craft an optimal Cerbos policy repository.
To learn more about how to write automated tests, and define the test data, check the testing policies documentation.
Evaluating policies
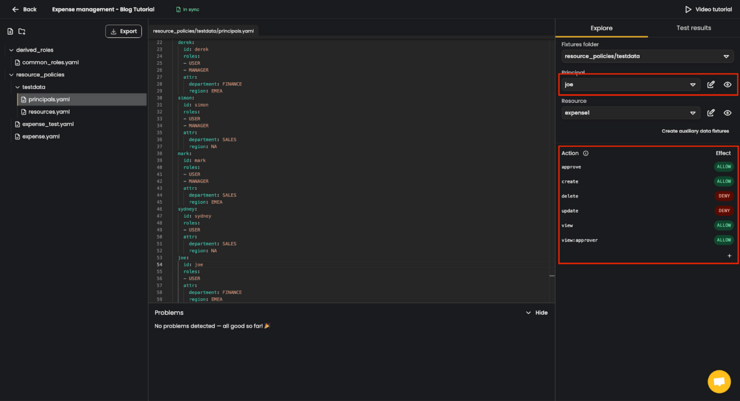
When writing the tests for your policy repository, or upon loading them from an existing policy repository, the Explore tab will load the test data and show you which permissions that a selected user (principal) has over the selected resource, for all of the actions which are defined.
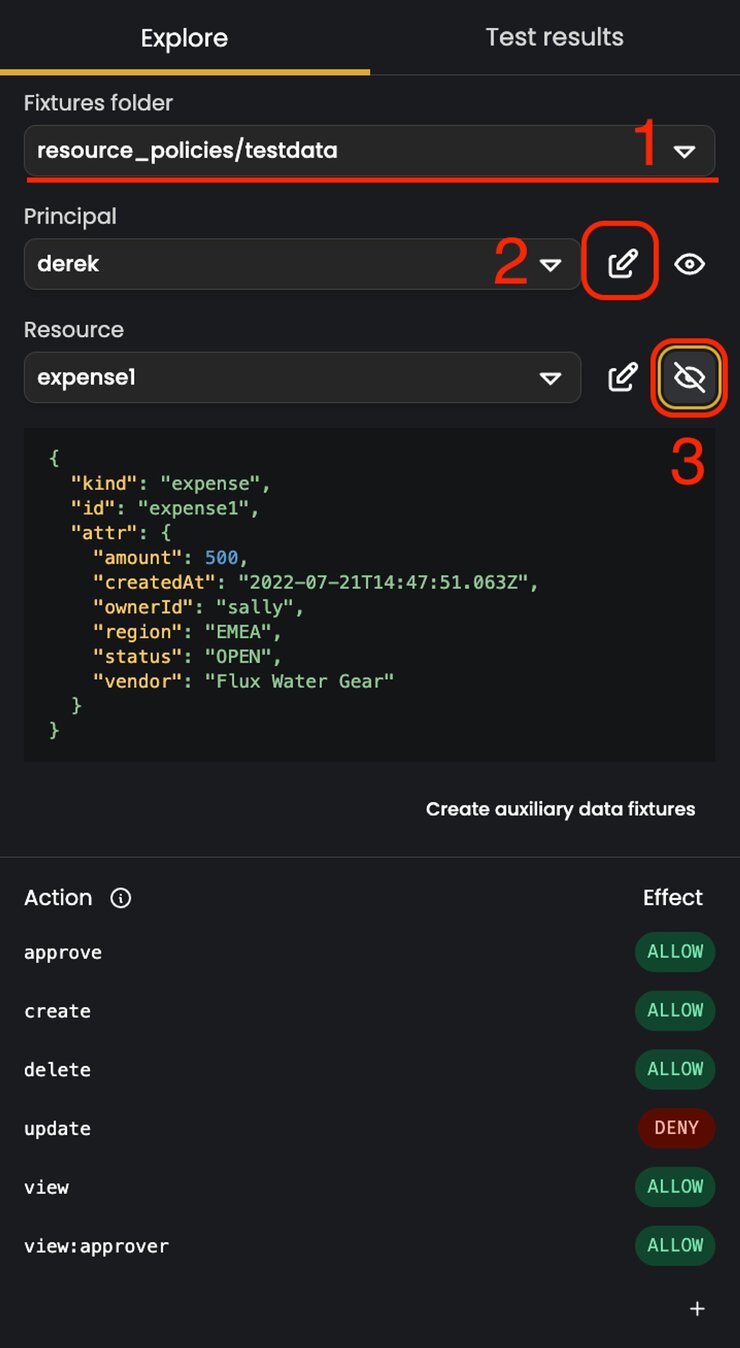
Using the Fixtures folderdropdown field (1), select the path to the directory storing dummy users and resources. In this case, resource_policies/testdata. The next dropdown shows you the user whose privileges you are reviewing for the selected resource. And below that you can switch between resources to show the user’s permission for each one. The pencil icons (2) to the right of the Principal and Resource dropdowns open the relevant testdata/ file where you can make edits to the dummy user or the resource. And clicking the eye icon (3) shows you a JSON structure of the selected principal or a resource.
Upon editing any of the policy repository files, the content of the Explore tab is updated accordingly. For example, let’s check all the defined principals in our testdata.
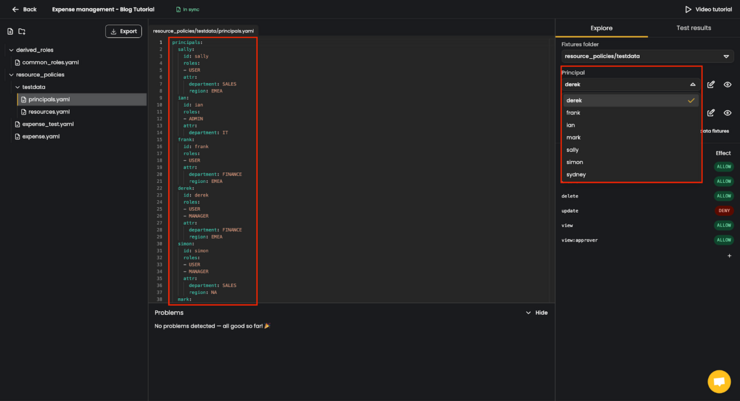
Let’s add another test principal. Update the contents of the principals.yaml file by adding the following snippet to the bottom of it.
  joe:
    id: joe
    roles:
    - USER
    attr:
      department: FINANCE
      region: EMEA
By doing this, we’ve added a test principal joe who has a regular USER role, and works within the FINANCE department of EMEA region. This change is automatically applied in the Explored tab, by adding joe to the list of principals.
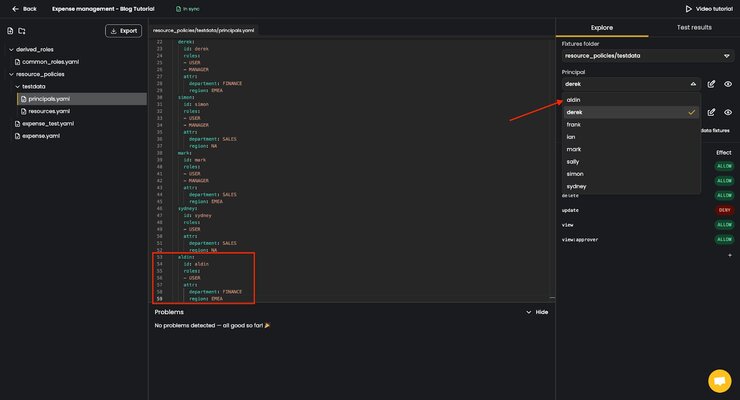
Upon selecting the new principal we see how the permissions differ from permissions given to derek, the previously selected principal.
Testing policies
Similar to Explore, the Test results tab automatically detects changes in policy repository files, and runs the tests defined across all the test files, in this case the expense_test.yaml file.
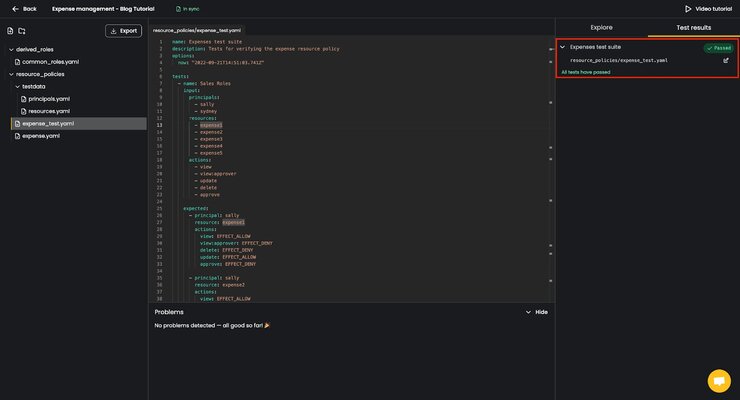
When you make changes to your test parameters, the test results will automatically update to reflect.
Let’s wrongly assume that (considering the defined access control policies) newly created principal joe has the rights for approve action on the expenses with IDs expense3 and expense4, but does not have the rights to approve the expense1. The tests will automatically recognize the issue and warn you:
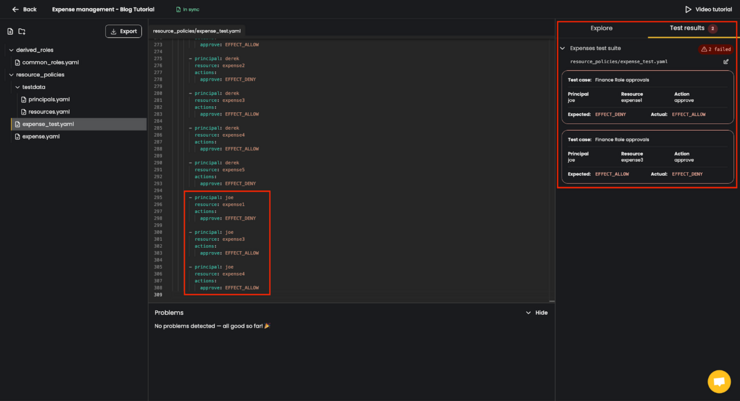
Given the attributes defined for principal joe and the mentioned resources, tests expect that the principal should be allowed to approve the expense1, and should be denied to approve the expense3.
Upon fixing the mistake, the tests automatically run again, showing that all the tests are passing.
Troubleshooting
On the bottom of the screen is the problem-detection section. If you break anything while editing any file, it will give you enough information to resolve the issues.
For example, if you add an invalid field to any of your policy repository files, you’ll see an error message. In the image below, we’ve intentionally added an invalid field to the definition of our OWNER derived role. It’s invalid because the property error we added is not a valid derived roles field. In the Problems window you see a list of files with errors related to your issue and specific information on the failure. There is an error in the common_roles.yaml file, and the file that references it, the expense.yaml file.
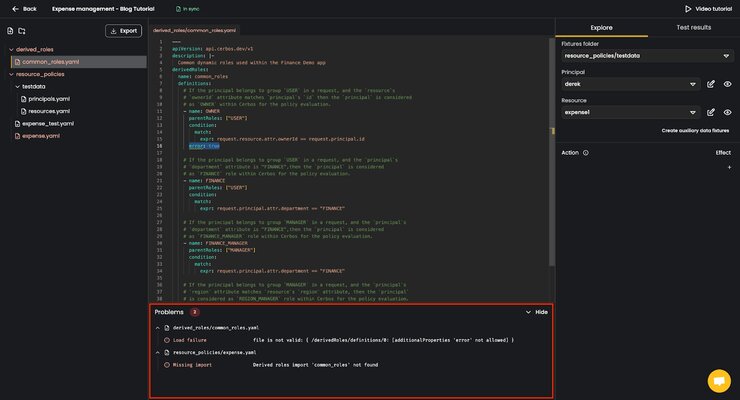
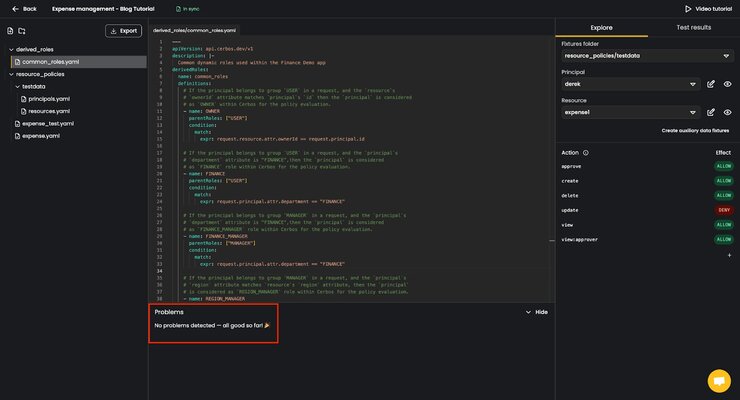
Removing the invalid line results in instant resolution of the detected problems, showing the “No problems detected” message.
Exporting policies
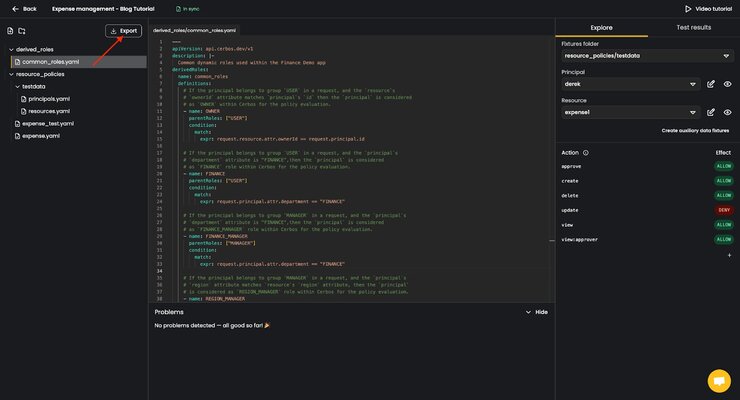
When your access control policies are ready, click the Export button, save them to the location of your choice, and then commit them to your repository.
Get started
Cerbos Hub saves you time managing and synchronizing every Cerbos PDP and policy repository across all your applications and services. You can get started for free by making an account here.
Cerbos Hub is currently in public beta, and we love getting feedback from our users. Join our Slack community to connect with other Cerbos users who have already helped us improve the product with their insights, as well as our Cerbos engineering team.
Book a free Policy Workshop to discuss your requirements and get your first policy written by the Cerbos team